Web animation and zu (and you)
Web animation and zu (and you)
One of the perks of working at zu is the encouragement that employees receive to enroll in training courses to improve their skillset. In mid-July 2016, some members of the zuKeepers team took part in the pre-release of Rachel Nabors’ Web Animation Essentials: CSS Animations and Transitions course. Our team had past experience with web animation, utilizing JavaScript libraries like GSAP and jQuery (our team’s preference is GSAP), but had little experience when it came to CSS-based animations, which is what this course focused on.
Rachel Nabors is an American cartoonist and web animation expert who shares her skills at various conferences around the world. She is known for her comic Rachel the Great, which features the daily life of her alter-ego and her cat sidekick Tuna P. Katz, the latter who plays a prominent role in the course’s code examples.
When I saw Rachel Nabors had created a Web Animation course, I was excited to take it. I follow her on twitter and she always has fantastic and informative content about web animation
Onto the course
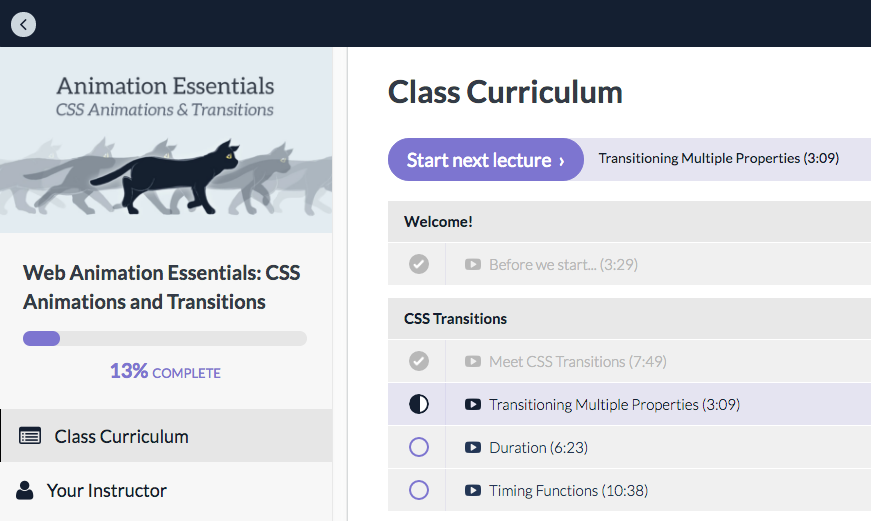
Each section of the course is composed of a video, a code example for you to follow along with (featuring Tuna P. Katz), and a downloadable version of the lesson should you wish to watch it offline. The course interface is organized to help you track your progress while making it easy to go from one lesson to another, or out of order if you so desired. Once signed up, lessons become accessible at any time so you can complete it at your own leisure.
To get started, we only needed to install Firefox Developer Edition and ensure Chrome was up to date. Due to all code being created on CodePen, we didn’t need to download a bunch of files and fiddle with getting a server setup. Having this quick of a setup was a nice feeling, as we were able to get into coding from the get-go, and not have the hassle of ensuring our environment had specific versions of Task Runners or External Libraries running. CodePen is a great tool of choice as it acts like a sandbox similar to JSFiddle.
Basic CSS animations
Transitions
Starting off, we learned about utilizing the CSS Transition property to create simple animations. With that comes great understanding on how ‘transition-property‘ (what to animate), ‘transition-duration‘ (how long), ‘transition-timing-function‘ (the rate of change during the animation), and ‘transition-delay‘ (offset the start time) properties all behave. The timing function was very interesting, and some nice examples of how those behave can be found here.
An interesting point in this section was the mention of some best practice concepts, such as taking into consideration how the human eye perceives change and how to focus on keeping your animation feeling “natural”. As well, an animator often has a different perspective than a viewer does. Something that looks natural during creation, may not appear natural to a user in production.
Animations
Once we had a decent understanding of what the Transition property could and couldn’t do, the Animation property was introduced. While Transition is best for animations that only occur once, a CSS animation can be looped a set number of times, or infinitely. As well, a CSS animation does not need a trigger, and can manipulate a number of properties. The explanations and examples that accompanied this portion, and the whole course, were very easy to follow and work with. The hands-on exercises were quite creative and seeing the material in action was immensely helpful.
Developer tools
Rachel also introduced some of Firefox and Chrome’s developer tool features that we previously had little experience with. Knowing we have the option to adjust an animation’s speed or timing function in the browser is very helpful when developing. Additionally, Chrome’s ability to measure a page’s animation performance was very eye-opening. Going forward, we will be using these tools on projects and will investigate our recently launched projects for potential improvements.
Advanced CSS animations
Later in the course, some more advanced techniques were introduced.
We learned how to take an image sprite and cycle through the frames of the sprite. This makes it possible to use just a single image to create a smooth walking animation akin to a filmstrip. With that knowledge in hand, we then learned how to chain animations together, which is to have one animation occur after another. The end result was a walking animation, followed by a sitting animation, as seen here.
Another interesting topic was the use of JavaScript Event Listeners with animations. An Event Listener is code that waits for certain events to occur and reacts to them, such as a mouse click or a keyboard press. For animations, Javascript is able to listen for ‘animationstart’ (the start of the animation), ‘animationiteration’ (while the animation is happening), and ‘animationend’ (the end of the animation). This precise control over when something will happen provides a lot of benefit to the developer.
Using Event Listeners was not the only animation chaining technique Rachel demonstrated. She had previously explored a way to use the duration property to ‘stack’ animations, and a way to add timing functions to the keyframe blocks at certain points of an animation. It was interesting to see multiple techniques, including the benefits and downfalls of each, for animation chaining.
Animation performance
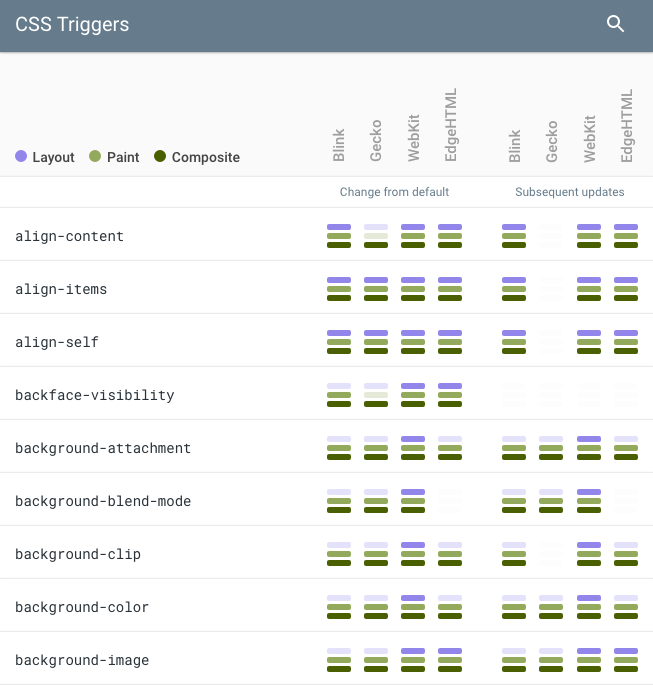
Rachel places a large focus on animation performance by dedicating a whole section to it. While our team was already mindful of its importance, we found it great to see examples of what exactly hurt an animation’s performance. This was described in conjunction with an online tool called CSS Triggers which helped visualize why overusing certain styles will take a toll on performance.
As well as teaching simple do’s and don’ts, Rachel also goes in-depth with demonstrating the power of Chrome’s performance tools to record and measure a single page’s load time. It can be a little intimidating to use firsthand, but we’ll be covering more about this in detail in a future blog post.
Summing up
This course was a great and easy learning tool for our team. By structuring lessons in such a way that the basics eased into the more complex concepts (with complimenting hands-on materials), and by incorporating fun elements of her past work such as the mascot Tuna P. Katz, Rachel’s experience and passion as a web animation expert is evident whether you’ve heard of her before or have been introduced to her just now.
I really enjoyed the work I had done with animation prior to this. Learning more in this course only made me more eager to experiment and incorporate animation into new projects!
To reinforce the ideas and principles that we learned, one of our developers, Devon, was inspired to make a simple Final Fantasy Rydia app. The idea behind this was to take an image sprite and display animations based on the character's typical actions from the game Final Fantasy IV.
Although CSS is generally desired over Javascript when animations are short and simple, it packs the power to be a competitive alternative to its other half when they’re not already being used together. While the full breadth of its capabilities are yet to be explored in later course iterations (we hope there will be more, by the way!), we have collectively felt that this introduction is a great first step for aspiring web animators to learn the basics. We look forward to Tuna P. Katz’s next adventure and what Rachel has in store in the future!
Previous animation experience
Before taking this course we did have some experience creating animations with JavaScript, but not CSS. A few of those sites include:
Author: Devon Rathie-Wright